


Burning an .iso file for a DVD
![]()
Some suggestions for this process
Windows | Mac | Linux Ubuntu
With the September 2010 launch of JPFO's new film "No Guns for Jews", we are bringing you the option to be able to download a large .iso (image) file, (as well as other formats and depending on your connection speed). The benefit from this is that with suitable software, high quality DVD copies can be burned and so enable (for non commercial use) the wider distribution of this important film. At a later date we may manage to offer image files for "No Guns for Negroes" and "2A Today for the USA", so quality DVD's of those can be made. To find about about options for downloading the very large files, check out this page.
The process is relatively straightforward and manageable by many but we do not necessarily suggest undertaking this if you are totally unfamiliar or uncertain. That said a friendly “computer geek” could well help you out!
An example of a free application worth considering is "Active@ ISO Burner 2.1". It is a simple-to-use dialog-style software to burn CD/DVD/Blue Ray ISO images compatible with the ISO 9660 standard. Automated burning is also supported, which is most helpful if settings are not well understood. There are many other applications out there and those who might consider burning their own DVD's from our image file may well have something installed already. A few other examples are ...... "NTI Media Maker", "Ashampoo Burning Studio", "Need4DVDBurner" etc.
The two standards for DVD are R plus and R minus — these days most burners will handle either, and it is worthwhile to use good quality media. Much further information on DVD and CD burning can be found via a web search.
Thumbnail images below can be clicked on to expand for larger size.
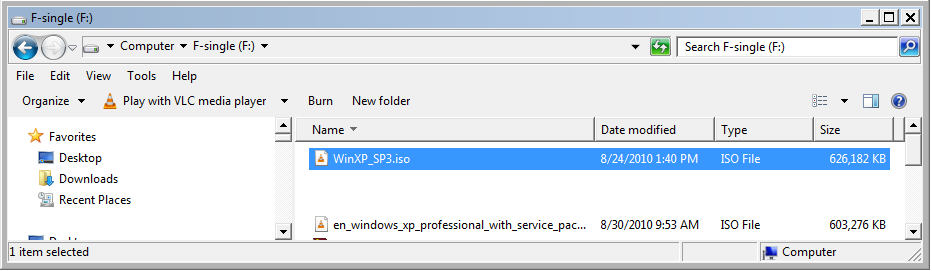
![]()
Active@ ISO Burner 2.1, Windows
This freeware application allows you to burn an ISO image to CD, DVD, and Blu-ray Disc blanks. Click here to download.
To burn a CD/DVD/Blue Ray ISO Image:

- 1. Step: Enter full path to the ISO image file to be created in the Source field. Use the Browse button to specify the path and file name via a standard File Save As... dialog. You can also Drag & Drop files from Windows Explorer to the Active@ ISO Burner dialog window. You can also place ISO file to the same directory where Active@ ISO Burner is installed/copied. After program is launched, the ISO file will be selected automatically. A drop down list contains all ISO files burned previously, it may also help you re-select the ISO.
- 2. Step: Insert a CD/DVD/Blue Ray disc into the burner drive.
Wait until media is properly detected and media information is displayed on the right. In the Target area verify the proper Burner to be chosen (if you have several burners), verify media information on the right, and click the BURN button. - 3 Step: Wait until burning is complete. The log includes the actions performed, errors, and the progress. To cancel ISO image burning click the CANCEL button. After burning is complete, click the GO BACK button to burn another ISO image, or just close the application

Burning options ....... Click the Options button (see first picture) to open the burner settings dialog. Default settings are shown in the image to right : >>.
![]()
How to Burn .ISO in Mac OS X:
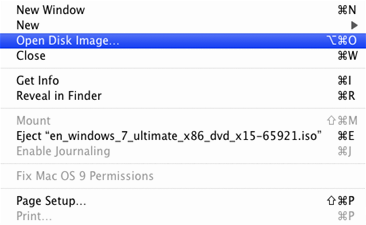
It’s an obvious hint for those who are using Mac from ages, but for someone who just migrated from Windows will Google a third party app like Nero or Power ISO to burn .ISO or Image files in Mac OS X Leopard, Snow Leopard. Mac OS X has a inbuilt Disk Utility created by Apple for performing disk-related tasks in Mac OS X. Disk Utility is able to create, convert, compress and encryption of disk images from a wide range of formats read by Disk Utility to .dmg or—for CD/DVD images—.cdr, which is identical to the .iso format. So if you ever need to burn a Image file or .ISO file then simply launch the DiskUtility and perform the following steps.
- Insert a blank disc in your DVD Drive and start Disk Utility.
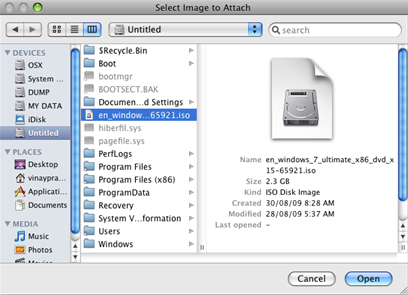
- From the File menu, choose Open Disk Image and select the ISO to be burned.
In the list of volumes, you will now see an item representing the ISO file. Select it.

- Click the Burn button and follow the instructions.
![]()
Burning an image file with Linux Ubuntu:
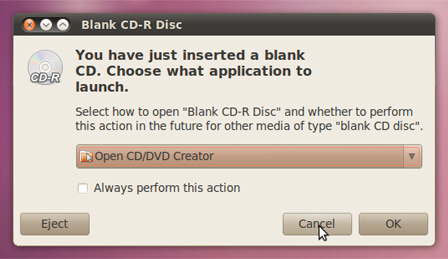
The procedure may differ slightly depending on which version of Ubuntu you are using.
1. Insert a blank CD into your burner. A 'CD/DVD Creator' or 'Choose Disc Type' window might pop up. Close this, as we will not be using it.

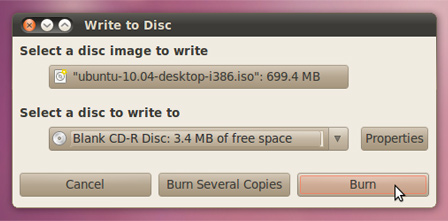
2. Look for the downloaded ISO image in the file browser.
3. Right click on the ISO image file and choose 'Write to Disc'.
4. Where it says 'Write disc to', you may have options such as 'File image' as well as your CD drive. Choose your CD drive. Your CD drive may show as something like 'BD-MLT UJ-210S'.
5. Select the write speed. If you are burning an Ubuntu Live CD (one that you may want to boot from), it is recommended that you write at the lowest possible speed.
7. After burning is completed, verify that your CD contains multiple files and folders and not just the ISO file. This way you will know the process was completed correctly.
More detailed technical instructions from the Ubuntu wiki
![]()